Showing posts with label quilting. Show all posts

Friday, October 28, 2011

Tree pants are (mostly) complete! Also, a few clips.

The people running the sew-along added another week to finish the project as I think it was taking people longer than they had originally planned.  I know with all the stuff I had going on that I definitely needed more time.  Unfortunately I had a number of problems finishing it, so I'll need even more time.  I'm planning on putting it and the sewing machine away for a couple of weeks so that I can catch up on other things.

The other good news is that the Halloween costumes are mostly finished.  Dan isn't sure yet how he wants to finish his costume, so I won't post photos until everything and everyone is ready to go.  And then I'll probably post a lot about it. :D

Anyway, here are some photos of the tree pants.


I clearly had issues with the binding which, for the first time, I made rather than purchased.  I couldn't sew it on evenly so will have to remove the whole thing and start over.  I'n not in a hurry to do that but as long as I get it done by the time we put up our tree, I'm happy.

I was also asked by a couple of friends to make some hairclips, which I was very happy to do.  Frankly, I miss clip making and hope to get back to it this weekend. 


Friday, September 16, 2011

The red/black quilt is finished!

Well, the quilt is finally complete.  I'm satisfied with it, though unhappy with several mistakes.   On the other hand, I feel this was another major learning experience and I know some of the things to avoid for next time.  I was very pleased when my husband commented on how much he liked it and asked me to make one for our family room.  I'm glad he's confident in my work and now I'm looking forward to the next one (though I have several other things to work on before that!). 

Here are some photos of the final process, in case anyone is interested.

After finishing the piecing, I started the quilt sandwich.  Here's a photo of the three layers: the backing (I ended up going simple with a super soft sateen fabric) , the batting (I used a very low-loft) and the quilt face (? not sure what else it's called).  After arranging the three, I pinned them together with safety pins.  Note to self:  buy more safety pins!


I trimmed the backing and batting a bit and then took it back to the sewing machine for quilting.  I felt a little more confident in straighter rows this time, so decided to do more stitching in the ditch.  I'm a long way off from being able enough to quilt designs, but I'm happy with the straight rows, particularly with a more modern looking quilt like this one.

The last step was to add the binding.  On the robot/monkey quilt I ended up hand sewing the binding because I didn't know any better.  It took me a week of sewing constantly to get it done because my inexperienced self made the most ridiculously tiny stitches.  This time I decided to machine sew it on and it not only looked much better, it was much easier.  The only problem I ran into here was trying to keep the binding on the sandwich in the process.  This was (mostly) solved by using snap clips.  


They worked great and I only had to fix a few places.

After that I just had to wash it and clip some ends.  Here's the end result:

And the coordinating tag blanket:

Some mistakes I will try not to make next time:
1) When sewing the blocks together, make sure all the blocks in a row stretch in the same direction
2) If I'm going to use white, apply fray check early and often, and use a thicker white fabric.  If you look close enough you can see a lot of frayed fabric in there.
3) When adding the sashing, quadruple check the length of the sash before cutting it and make sure it goes to the end of the row (though the red squares were a happy fix).

Yesterday I received a new AccuQuilt die in the mail: Circles.  Time for my next project!

Monday, September 12, 2011

Quilt making - an acceptable birthday activity

Saturday was my birthday and I decided to spend a lot of it working on the red/black quilt as I knew my husband would be running kid interference for most of the day.  Unfortunately it ended up being a rather frustrating process as I proceeded to make error after error.  The best I can say is that I have learned much  about quilt making, the worst is that I have a ton more work to do before I'm finished. :)

Last week I was at my friend Jana's house working on the quilt.  She has a LOT more patience than I do when it comes to crafting so was instrumental in  helping me focus on fixing some errors I had already made. We noticed that the black squares were smaller than the other squares and that threw off row alignment.  A few times we had to cut new black squares and resew the rows.  In the end, each row had to be resewed and it wasn't until Saturday when I realized why they were a problem.  After all, I had cut everything with the Accuquilt, so how could the black squares be smaller?
I turns out that ironing the black squares caused them to shrink and distort.  The other fabric didn't have that issue, but the black did. This became apparent when I was ironing down the seam on a piece of the sashing:


So that added quite a bit more work. :)
Once I finished sewing on the sashing I realized that I had made an error by not making them long enough for the corners and one of them was just plain too short:

Those were pretty pathetic mistakes and made by someone who really should have just taken a break for the day. :)  The good thing is that I was inspired to sew red squares onto the corners which I think will really make it pop.

So the next step is to sew on the red squares, do some end snipping and fray checking and figure out what I'm going to do for the backing.

I also ended up unhappy with the 75% completed matching tag blanket.  And I am rapidly running out of time.

I'd like to add that having a fraction of my chair to sit on while sewing doesn't help the process!


Tuesday, September 6, 2011

More work on the black/red quilt

I fought with my sewing machine throughout the weekend and managed to get some of the quilt done.  However, it got so bad in the end (examples below) that I had to stop.  Luckily, I have a couple of friends who are willing to let me borrow their machines until I finish the project.  Not sure where to go from here with my machine.  I can take it back in for repair or, if I ask Dan nicely enough, maybe eventually get a new, better machine.  Preferably one without a plastic bobbin race.  My first step, regardless, is to see if the repair place has a warranty on their work.

I managed to get a bit of sewing done though the machine would start to pull in fabric and I'd have to clean it out a few times and leave it for a couple hours before it would stop that mess.  And now, no matter what, it does what you see below.


Anyway, I managed to get a little done, mostly sewing the white rows onto the blocks and then the blocks together:

I finished up last night by pinning the outside (and inner) white rows onto the block rows.  After I finish sewing those, I have to do the outer sashing and then I'll start working on the quilt sandwich.  I had hoped to be further along at this point, but my machine had different ideas.

So did this guy:

Friday, September 2, 2011

Work on the quilt has (finally) begun.

I have a lot of catching up to do, which I will do over the course of this weekend (I hope).  I've been working on a lot of smaller projects that, combined with ots of craziness, have delayed work on the quilt.  But today I got back into it in earnest and I hope to dedicate a large part of the holiday weekend working on it.

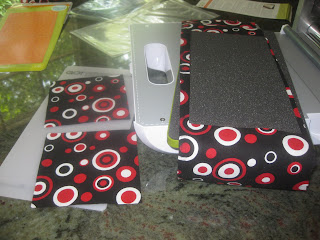
Anyway, today I worked on ironing and cutting, two things I hated doing until I got my Accuquilt Go.  Though I think I might need to consider investing in a new ironing board.  I still have this one from my university days:

Anyway, I thought I would show off the Accuquilt Go a little bit, in case people are interested and not familiar with it. I am a terrible, terrible cutter.  I even attempted to use a rotary cutter and it didn't help me much.  I still have to use it a bit with the Accuquilt, but mostly for prep, and as a result my cuts are MUCH more uniform.

  Step 1: Cut fabric into strips so it can better fit onto the die.
Step 2: Arrange strip on the die with the cutting mat.
Step 3: Run it through the cutter
And voila!
So here's the end result with that small pile being the only scrap. 
It still took me a couple hours, but I know I made better cutting decisions, had less waste, and managed to get enough done to be prepped for a matching taggie blanket!


So on to the next step, pinning. 

Wednesday, August 3, 2011

Black/Red Baby Quilt - Phase 1

The two dies I had been waiting for have finally arrived (yay!), which means I can get started with the quilt.  I purchased a 5" charm square and 1 1/2" strip, which I imagine will come into a great deal of use.

So now begins the process of planning the pattern as well as washing and pressing the fabric and cutting all the pieces. My hope is to get it all done by the end of the week so I can start sewing in earnest over the next two weeks.  This quilt will be simple, though more involved and looking more traditionally "quilt-like" than the last.

Sunday, July 17, 2011

My second quilt is finally in the making.

I have a girlfriend who is due later this year.  She and her husband have decided not to find out the gender but I thought instead of going with typical greens, yellows and oranges, I would try a black, white and red quilt instead.  I bought the fabrics yesterday and I'm SO EXCITED!  I think it will turn out great if I can find the right beginner pattern.  I'm looking forward to getting started.

Wednesday, April 27, 2011

The robot monkey quilt is done!

I'm glad to have finally finished my first "real" quilt.  Unfortunately there were many errors, but it ended up pretty nice and helped me get a little better.  At least I'm learning some things NOT to do. :)

For example, machine bind the quilt and let the seam show unless you're going to get it professionally done.  Hand sewing thousands of stitches, taking a week to do, when you're the worst hand sewer on the planet is probably not the way to go.  Still, it made for an interesting groove/texture thing on the back (at least that's what I tell myself).

Soooooo many stitches
I didn't take any photos of the squares before I sewed them into rows, and then the rows together, but here's a picture as I was preparing to sew on the border:

As you can see, there were already many imperfections and poorly matched seams.  I swear I tried to do better!

Finally it was time to add the padding and the back.  Here it is getting pinned down and ready for quilting:


And here's my work station as I was quilting.  Not perfect, but it's all I've got. :)

And here's where I found out that though my machine is nice for embroidery and great for regular sewing tasks, it's not so hot for quilting.  I barely had room to pass a baby quilt through that small arm. A full sized quilt will be a struggle, if not impossible.

Because I had so many problems with lining up the rows, I ended up only doing horizontal stitching in the ditch.  Not exciting nor interesting, but it worked.  I also didn't have a walking foot so I think my options were pretty limited (hey, I'm still learning).  I was also running out of time as my broken machine had set me back a few weeks.

Finally it was time to add the binding.  I ended up cheating here and buying pre-cut and folded blanket binding.  I was lucky to find just the right color.  I followed the binding instructions in the beginning quilting book only to realize those instructions hated me. :) I machine sewed the binding to the front and then hand sewed the back.  Ugh.  It looked strange because I'm so bad at hand sewing and it took ages to do.  But, when it was done, I was finally done.  Yay!

Here it is complete.  I hope my friends like it!

Monday, February 7, 2011

Monkey/Robot quilt

Note: I removed this post when I originally wrote it so that it would be a surprise.  Well, it's finally finished and delivered (or at least shipped), so here's the information!

Also at Christmas I found out one of my girlfriend's was having her first baby this spring.  She and her husband have decided not to know the gender of the baby until it is born and she mentioned to me they wished they could do a monkey/robot theme for the nursery (I love them!).   I thought about how impossible of a task that would be and then thought to myself, "Perhaps this can be solved with a quilt!"  Thus my next project was born (which I will talk about later in case the subject of the quilt comes upon this blog).

This time I bought a quilting book for beginners and ended up with First-Time Quiltmaking.
I decided to go with the single-patch quilt as I had the die for it and it was a lot like the one I had already done, so I was hoping I could build off of what I had picked up from the last time.  I also decided to go with one type of fabric (flannel) instead of the crazy mixture (velvet, minky, satin, etc.) that I had for the first one which gave me more headaches than I could count.

For the past couple of weeks I've been working on collecting fabric for the Monkey/Robot quilt.  Finding gender neutral robot and monkey fabric that was cute and would look nice together proved to be a little harder than I had originally thought.  I found the perfect robot fabric at JoAnn and found an acceptable monkey fabric (precut on the sellers AccuQuilt Go!) on eBay.  The gal I bought from on eBay included a square of a different monkey fabric which was PERFECT.  I contacted her directly and got a bunch of that fabric.  I purchased some solids (yellow for alternating squares, green for a border and orange for the back) to go with the two as anything more interesting would, I think, make a hot mess.

ANOTHER NOTE: I ended up using orange for the border, a yellow binding and cream for the back.

Last night I finally pulled out the Accuquilt Go! and in less than an hour had all my cuts done (granted, they're just squares but hey, I'm new at this!).  Well, most of my cuts done.  I had also purchased a strip die but didn't realize I needed a different sized cutting mat for it (as much as I love this machine, it can get expensive, and my wish list for it is LONG).  I ordered it last night and should be getting it this week.

So later this week I'll be going back to the book, dusting off my sewing machine and starting to piece it all together.  Very excite! :)

 
Here's the monkey fabric

The robot fabric is just the robots, not the other stuff.

Quilting - my (very short) history

I have created one quilt so far, and that was largely from a kit.  It was a girly, pinky crib quilt for my daughter after she was born.  I liked the fabrics that came in the kit, but I wanted to make it larger and use other fabrics that I enjoyed.  I added some minky that I had also used to make her a small taggie blanket, as well as a few other things, including my first stab at machine embroidery. In my opinion, the result can only barely be labeled as a quilt.  I literally jumped two feet into the project, sewed it poorly (I'm new at sewing too) and had no idea how to actually "quilt" the sandwich.  So I used ties, which I know are an acceptable alternative but, well...it wasn't great.  Since then, a few seams have come undone and eventually she threw up blueberries on it which stained it beyond repair.  So I knew I wanted to make her a new quilt.  I had also purchased material for a full sized quilt for my son, but that sat on the shelf waiting for the day I would have the time and energy to cut the pieces.

And then, for Christmas, my husband bought me the AccuQuilt Go!.  It was a game changer.  He got it for a very good price on Black Friday and my excellent friend, Jana,  gave me a couple dies for Christmas.
Edit: information about the next quilt removed in case the intended happens upon this blog.  I'll put up more details once it's finished.


Here's a picture of the quilt I made my daughter, pre-blueberry stain!
Here are the fabrics I chose for my son's quilt